Wednesday 6 May 2020

Link your custom godaddy domain to your blogspot account.

If you purchased custom domain in godaddy have to link your custom domain(pics.com) to blogspot account(pics.blospot.com).

1.Please login into your blogspot account goto settings > basic > published tab > click the setup third party account.


2.Enter your custom domain name like "www.pics.com" without omitting "www" as below screenshot.


3.click save you will get an error sayings " we have not been able to verify authority of your domain".

Please take this screenshot for your future reference as shown in below.
Please note the highlighted details in your screenshot.


3.Login into your godaddy account, goto my products > IN domains (select manage) > Additional setting or find the "manage DNS" options > select manage DNS

Domain records list will show here,


4.check CNAME record is there if available try to edit the record 

Add below details its default for google blogspot accounts.

Hostname :  www

Point to   : ghs.google.com
TTL     :1 hour

 5.Click ADD one more CNAME options points to your blog.


    hostname :  copy the hostname  you taken screenshot from  blogspot in 3 rd step

    Point to   : copy the point to link you taken screenshot from  blogspot in 3 rd step
    TTL : 1hours

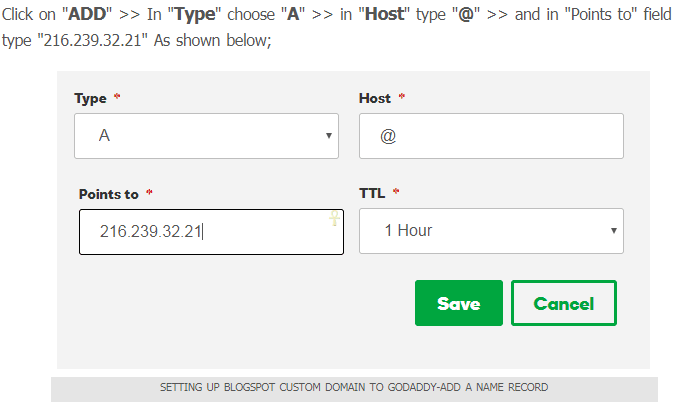
6.Here you need to add 4 IP addresses which are common for all the blogger users at the same record table shown above.

Click on "ADD" >> In "Type" choose "A" >> in "Host" type "@" >> and in "Points to" field type "216.239.32.21" As shown below;


Again as same as above, including all add following 4 address;

216.239.32.21
216.239.34.21
216.239.36.21
216.239.38.21
 Now domain record show below,


Once you completed all the above steps, then its time to save all the settings and publish the blog.


Again  goto blogspot settings > basic > published tab > save it ,Wait for 1 hours to process your request.


Tuesday 5 May 2020

Retrieving all user privileges within Oracle database.

Querying DBA/USER Privilege Views

A database administrator (DBA) can simply execute a query to view the rows in DBA_SYS_PRIVS, DBA_TAB_PRIVS, and DBA_ROLE_PRIVS to retrieve information about user privileges related to the system, tables, and roles, respectively.

For example, a DBA wishing to view all system privileges granted to all users would issue the following query:

SELECT * FROM DBA_SYS_PRIVS;

The DBA_SYS_PRIVS view contains three columns of data:

GRANTEE is the name, role, or user that was assigned the privilege.
PRIVILEGE is the privilege that is assigned.
ADMIN_OPTION indicates if the granted privilege also includes the ADMIN option.
To determine which users have direct grant access to a table we’ll use the DBA_TAB_PRIVS view:

SELECT * FROM DBA_TAB_PRIVS;

GRANTEE is the name of the user with granted access.
TABLE_NAME is the name of the object (table, index, sequence, etc).
PRIVILEGE is the privilege assigned to the GRANTEE for the associated object.
Finally, querying the DBA_ROLE_PRIVS view has much of the same information but applicable to roles instead, where the GRANTED_ROLE column specifies the role in question:

SELECT * FROM  DBA_ROLE_PRIVS;

Querying the Current User’s Privileges
If DBA access isn’t possible or necessary, it is also possible to slightly modify the above queries to view the privileges solely for the current user.

This is done by alternatively querying USER_ versions of the above DBA_ views. Thus, instead of looking at DBA_SYS_PRIVS we’d query USER_SYS_PRIVS, like so:

SELECT * FROM USER_SYS_PRIVS;

Since the USER_ privilege views are effectively the same as their DBA_ counterparts, but specific to the current user only, the type of returned data and column names are all identical to those when querying DBA_ views intead.